
 |
Installation document for Product Short Description |
Requirements
.ocmod.zip format).VQMOD
| Requirement | Notes |
|---|---|
| Installed and activated VQMOD | Requires version 2.5.1 or higher. Applies only to OpenCart 4.0.x. |
Writable folder vqmod/xml and vqmod/vqcache |
Set CHMOD 755 or 775 (avoid 777 unless necessary) |
Executable file vqmod.php |
Ensure CHMOD 755 or higher |
| Error checking | Review vqmod/logs/vqmod.log if installation fails |
vQMOD How to Install vQmod for OpenCart 4.x |
OCMOD
| Requirement | Notes |
|---|---|
| Administrator permission for OCMOD | Required to install and manage extensions |
Writable folder system/storage/modification |
CHMOD 755/775, needed so the system can store the compiled patch |
| FTP configuration (if using the Installer via FTP) | Required when uploading extensions through the Installer feature |
| PHP version | PHP 7.4–8.0 (OC 3.x) · PHP 8.0–8.1 (OC 4.x) |
| Error checking | Go to Extensions → Modifications → Refresh to see OCMOD compilation errors |
1. Upload
The process of uploading the extension file to the system through the Admin Panel.
-
Download the extension
Get the module file from a trusted source (OpenCart.com, OpenCartPlus.com, or the official vendor). The file is usually
.zipor.ocmod.zip / vqmod xml. -
Log in to the Admin Panel
Go to
http://yourdomain.com/adminusing an account with administrator rights. -
Go to Extensions → Installer → Upload:
The system requires a modification file with the extension
'.ocmod.zip'. Click the button and select your file. The system will automatically extract and validate the file structure. Image 1.1: Upload button in OpenCart AdminNote: If the package is provided as a standard
'.zip', first extract it and then choose the'.ocmod.zip'file inside for installation. -
Confirm
The system shows a success message if the file is valid. If it shows an error, re-check the folder write permissions from Step 1.
2. Add permission
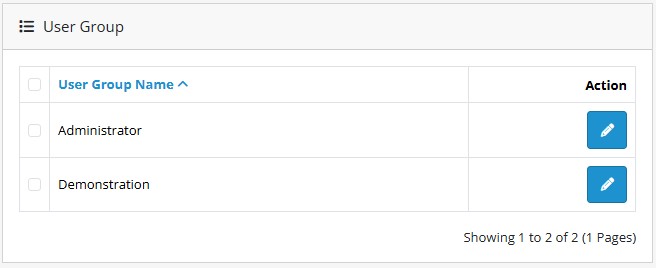
Login to your OpenCart admin panel and go to System → Users → User Group.
Click Edit on your user group name. (Default user group name is Administrator, see Image 2 below).
Next, check Access Permission and Modify Permission (see Image 2.1).
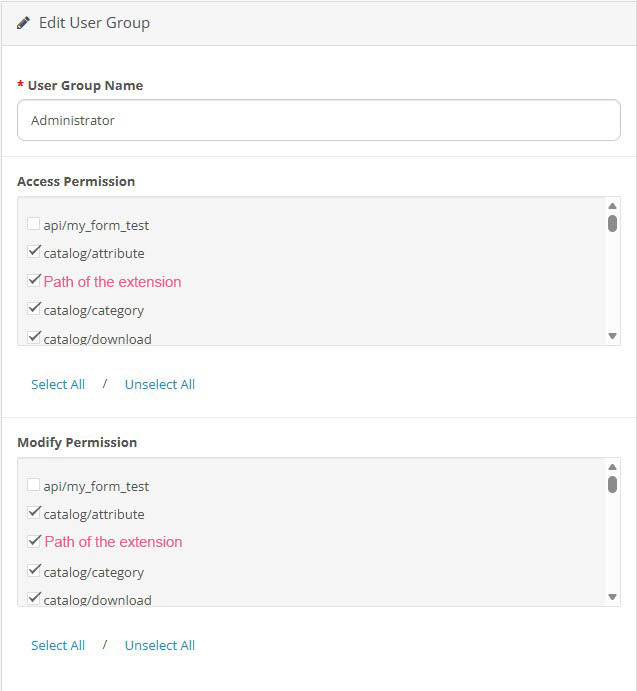
extension/module/redirect_manager_pro
3. Installation
Activate the extension after the file has been uploaded successfully.
-
Install from the Installer for Opencart 4.x
Go to Extensions → Installer, find the extension name you just uploaded, and click the Install icon (+).
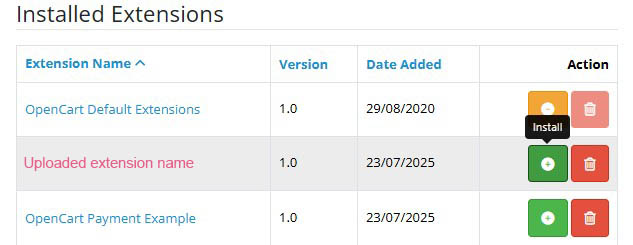 Image 3.1: The name of the extension you just uploaded and the Install (+) icon.
 -
Choose the extension type
Go to Extensions → Extensions select the corresponding extension type in the dropdown (Modules, Payments, Shipping, Themes...), find the name of the extension you just uploaded in the list → click the Install icon (+).
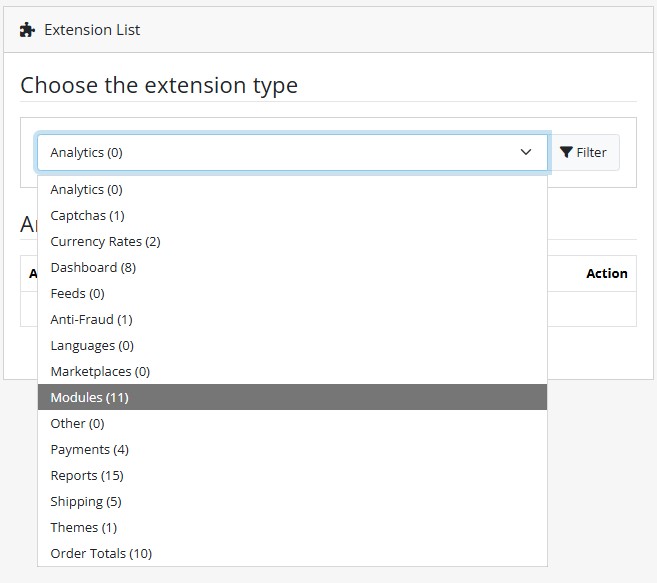 Image 3.2: Choose the extension typeNote: To correctly select the extension type when installing an extension, check the file
extension_name.phpinside theuploadfolder of the downloaded.zipor.ocmod.zip. The directory where this file is located (for example:payments,module,other, etc.) indicates the type you should choose in Choose the extension type.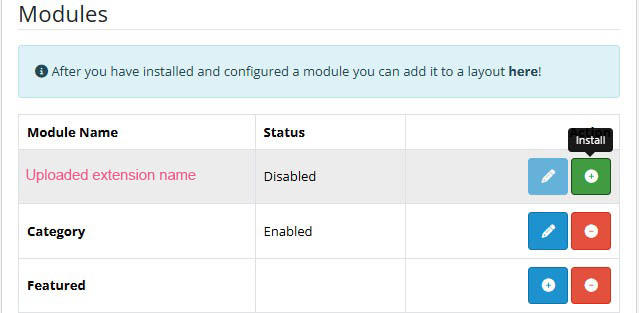 Image 3.3: click the Install icon (+)
 -
Activate the extension
Find the extension name in the list → click the Edit (pencil) to enable and configure it.
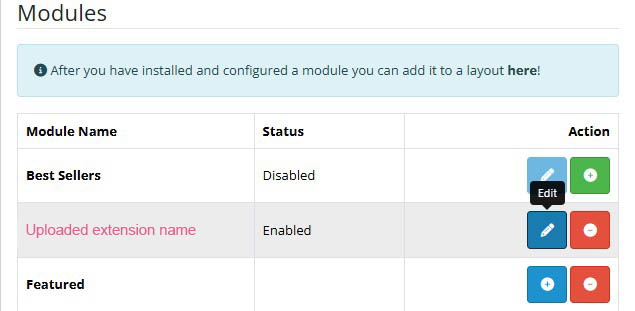 Image 3.4: click the Edit (pencil) to enable and configure
 -
Activate the License Key
Enter the license key provided on the download page or in the purchase confirmation email.
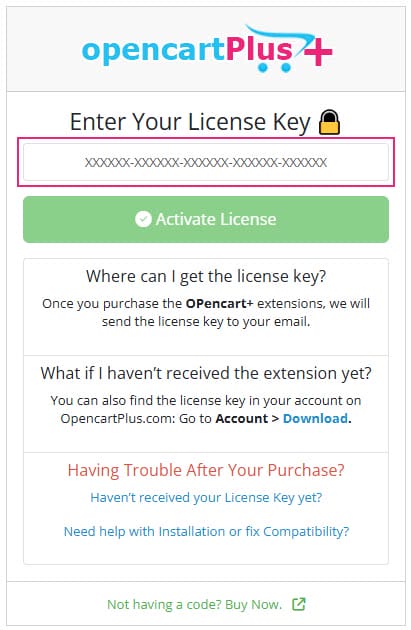 Image 3.5: Activate the License Key
4. Configuration
Set the operating parameters for the extension.
Go to Extensions → Extensions → Choose the extension type → Modules → OpencartPLus.com Product Short Description → click the Edit (pencil).
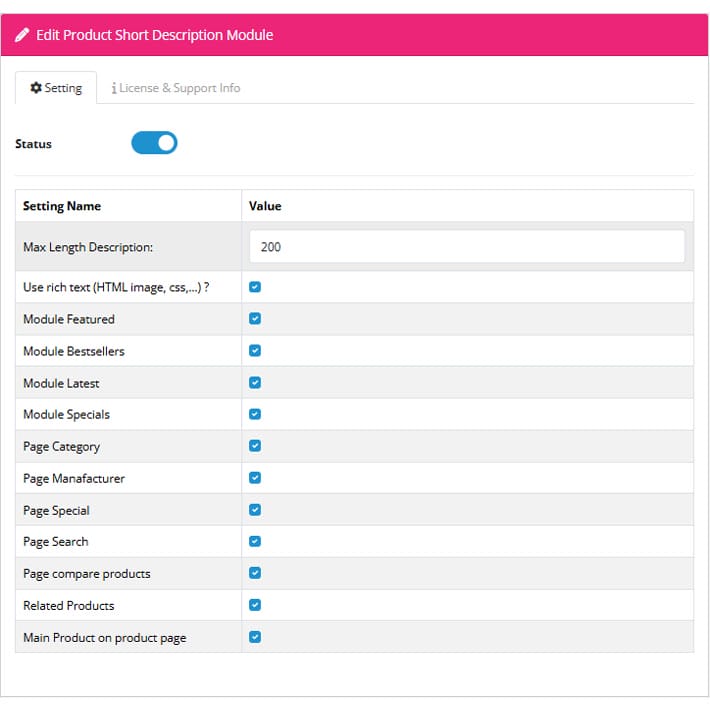
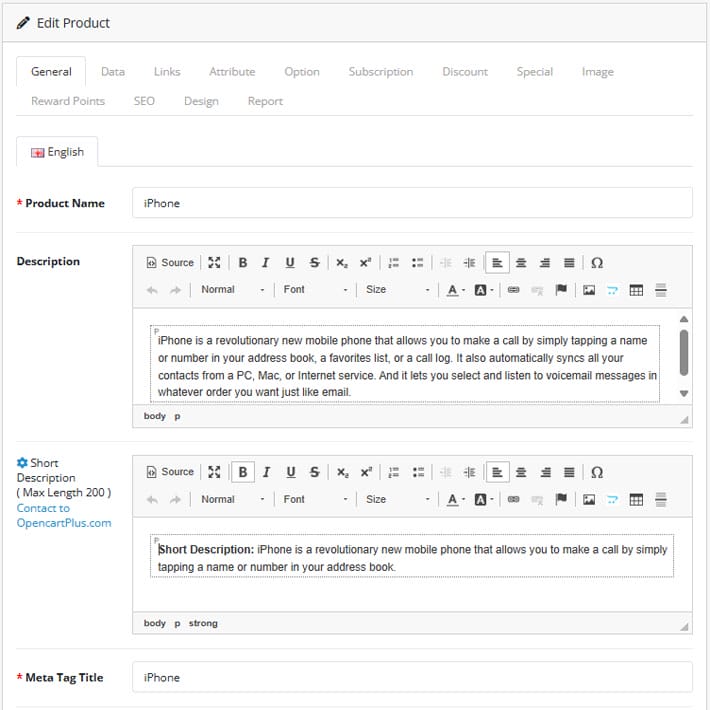
Why do you need this module?
Product Short Description is really a HUGE productivity improvement solution for your ecommerce stores. Your selling becomes more flexible by introducing detailed product descriptions. It's especially useful when you must sell highly detailed products to specific target customers.
5. Clear Cache & Use
Clear the cache to make sure your changes take effect on the front end.
- Go to Admin Panel → Dashboard → Developer Settings, then click the button to clear old cached data.
 Image 5.1: Refresh developer settings
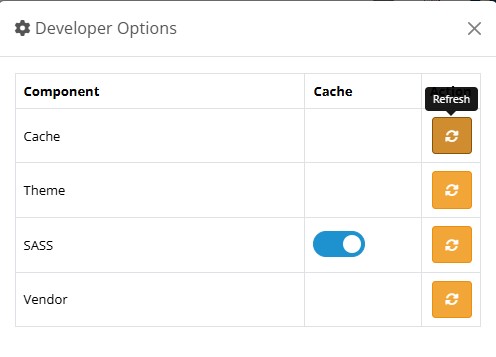 Image 5.2: Refresh developer options
 - Check Extensions → Modifications → Clear → Refresh to ensure that OCMOD modifications are recompiled correctly.
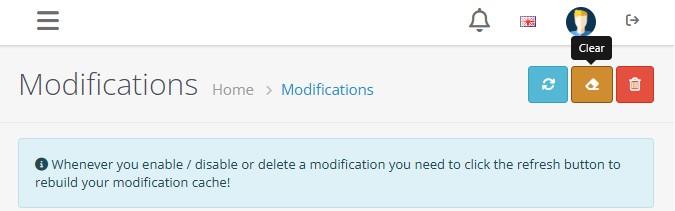 Image 5.3: Refresh modifications clear
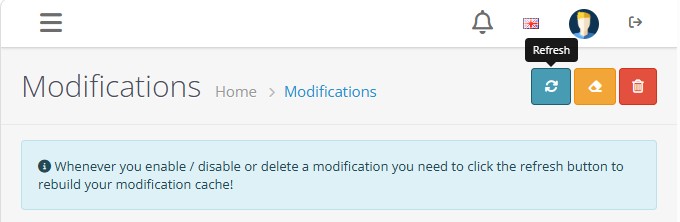 Image 5.4: Refresh modifications
 - If the extension uses VQMOD, also clear the cache in the folder
vqmod/vqcache/located in your OpenCart root. Inside thevqcachefolder, you will see multiple files named likevq2-xxxx.php. Delete all these files (do not delete the folder itself).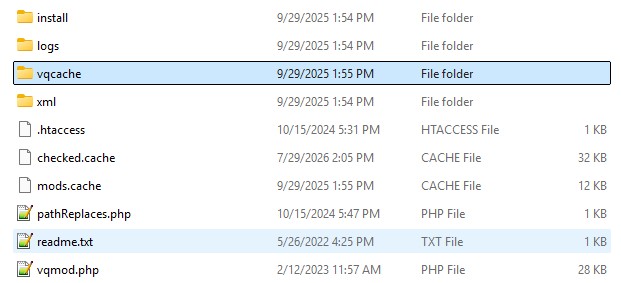 Image 5.5: Clear the cache in the vqmod/vqcache/ directory
6. Final Step & Enjoy new extension
The last step to confirm the extension is working correctly.
Go to Extensions → Extensions → Choose the extension type → Modules → OpencartPLus.com Product Short Description → Edit and adjust any final settings if needed.
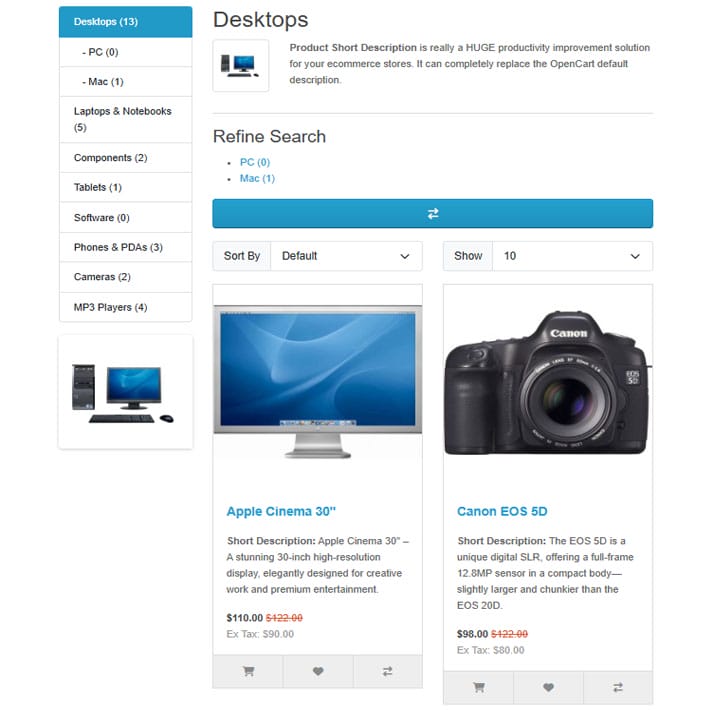
Visit the Category Name page on the online store interface helps verify that the module displays and functions correctly in practice.

7. Common Troubleshooting
Extension doesn't appear after Install
Recheck the cache (Step 5) and make sure the module is set to Edit → Status: Enabled. For OCMOD, also check Extensions → Modifications → Refresh.
VQMOD error: "File could not be found"
Usually caused by an incorrect path in the VQMOD XML file, or the vqmod/vqcache folder not being writable. Check the log at vqmod/logs/vqmod.log.
White screen after installing OCMOD
Go to Extensions → Modifications, click Clear then Refresh to remove the faulty modification cache, then try again. If the error persists, manually remove the extension's file from system/storage/modification.
Layout breaks after installing
The most common cause is the extension containing CSS/JS written for the wrong Bootstrap version. Cross-check the classes it uses against the Bootstrap version your OpenCart is running (OC 3.x uses Bootstrap 4, OC 4.x uses Bootstrap 5).