
 |
Installation document for Converge / Elavon / Virtual Merchant |
Requirements
.ocmod.zip format).VQMOD
| Requirement | Notes |
|---|---|
| Installed and activated VQMOD | Requires version 2.5.1 or higher. Applies only to OpenCart 4.0.x. |
Writable folder vqmod/xml and vqmod/vqcache |
Set CHMOD 755 or 775 (avoid 777 unless necessary) |
Executable file vqmod.php |
Ensure CHMOD 755 or higher |
| Error checking | Review vqmod/logs/vqmod.log if installation fails |
vQMOD How to Install vQmod for OpenCart 4.x |
OCMOD
| Requirement | Notes |
|---|---|
| Administrator permission for OCMOD | Required to install and manage extensions |
Writable folder system/storage/modification |
CHMOD 755/775, needed so the system can store the compiled patch |
| FTP configuration (if using the Installer via FTP) | Required when uploading extensions through the Installer feature |
| PHP version | PHP 7.4–8.0 (OC 3.x) · PHP 8.0–8.1 (OC 4.x) |
| Error checking | Go to Extensions → Modifications → Refresh to see OCMOD compilation errors |
1. Upload
The process of uploading the extension file to the system through the Admin Panel.
-
Download the extension
Get the module file from a trusted source (OpenCart.com, OpenCartPlus.com, or the official vendor). The file is usually
.zipor.ocmod.zip / vqmod xml. -
Log in to the Admin Panel
Go to
http://yourdomain.com/adminusing an account with administrator rights. -
Go to Extensions → Installer → Upload:
The system requires a modification file with the extension
'.ocmod.zip'. Click the button and select your file. The system will automatically extract and validate the file structure. Image 1.1: Upload button in OpenCart AdminNote: If the package is provided as a standard
'.zip', first extract it and then choose the'.ocmod.zip'file inside for installation. -
Confirm
The system shows a success message if the file is valid. If it shows an error, re-check the folder write permissions from Step 1.
2. Add permission
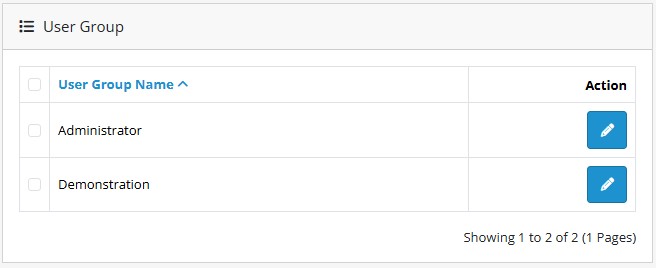
Login to your OpenCart admin panel and go to System → Users → User Group.
Click Edit on your user group name. (Default user group name is Administrator, see Image 2 below).
Next, check Access Permission and Modify Permission (see Image 2.1).
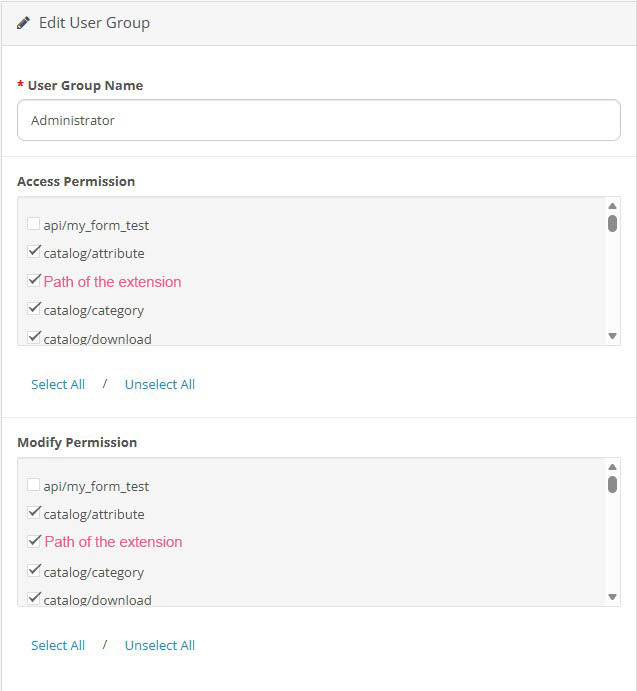
extension/module/redirect_manager_pro
3. Installation
Activate the extension after the file has been uploaded successfully.
-
Install from the Installer for Opencart 4.x
Go to Extensions → Installer, find the extension name you just uploaded, and click the Install icon (+).
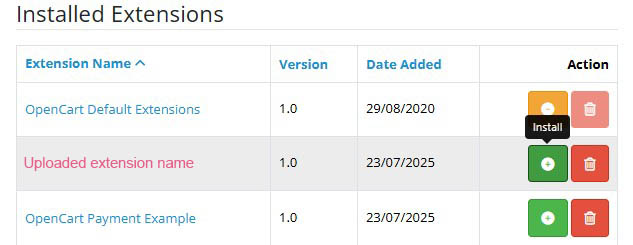 Image 3.1: The name of the extension you just uploaded and the Install (+) icon.
 -
Choose the extension type
Go to Extensions → Extensions select the corresponding extension type in the dropdown (Modules, Payments, Shipping, Themes...), find the name of the extension you just uploaded in the list → click the Install icon (+).
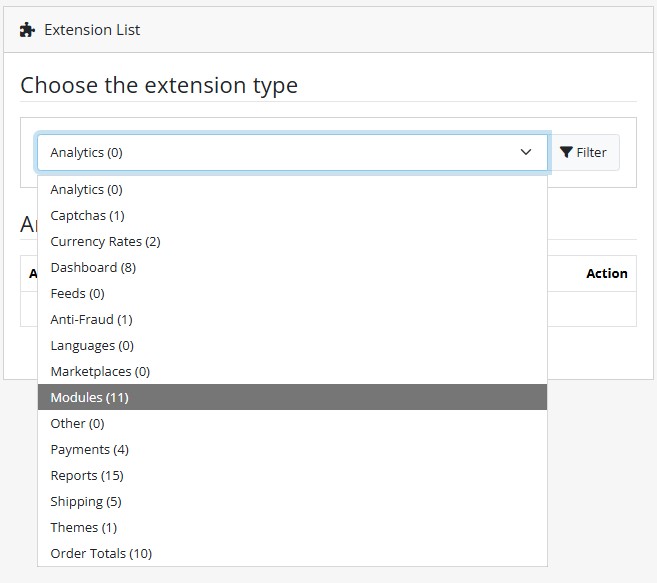 Image 3.2: Choose the extension typeNote: To correctly select the extension type when installing an extension, check the file
extension_name.phpinside theuploadfolder of the downloaded.zipor.ocmod.zip. The directory where this file is located (for example:payments,module,other, etc.) indicates the type you should choose in Choose the extension type.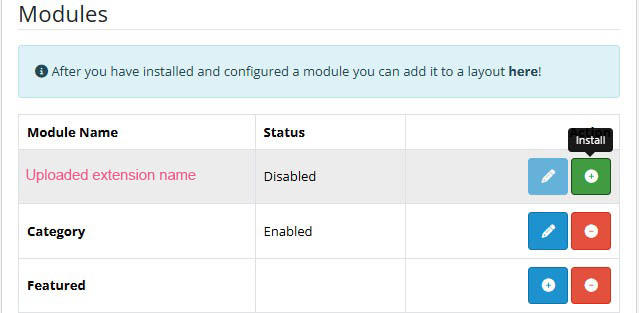 Image 3.3: click the Install icon (+)
 -
Activate the extension
Find the extension name in the list → click the Edit (pencil) to enable and configure it.
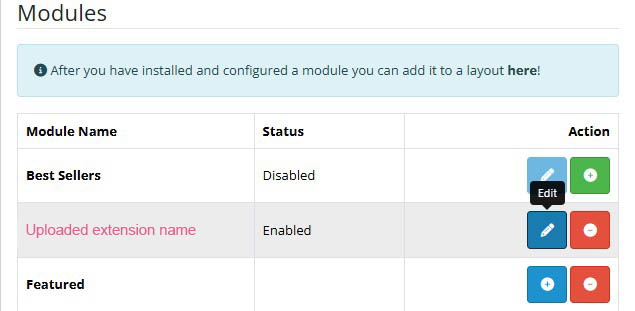 Image 3.4: click the Edit (pencil) to enable and configure
 -
Activate the License Key
Enter the license key provided on the download page or in the purchase confirmation email.
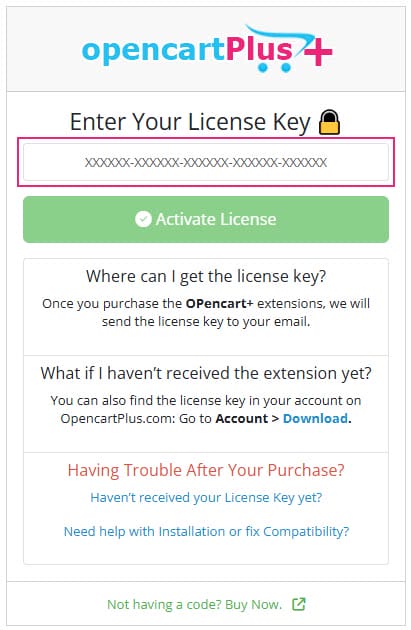 Image 3.5: Activate the License Key
4. Configuration
Set the operating parameters for the extension.
Go to Extensions → Extensions → Choose the extension type → Modules → OpencartPLus.com Virtual Merchant Pro → click the Edit (pencil).
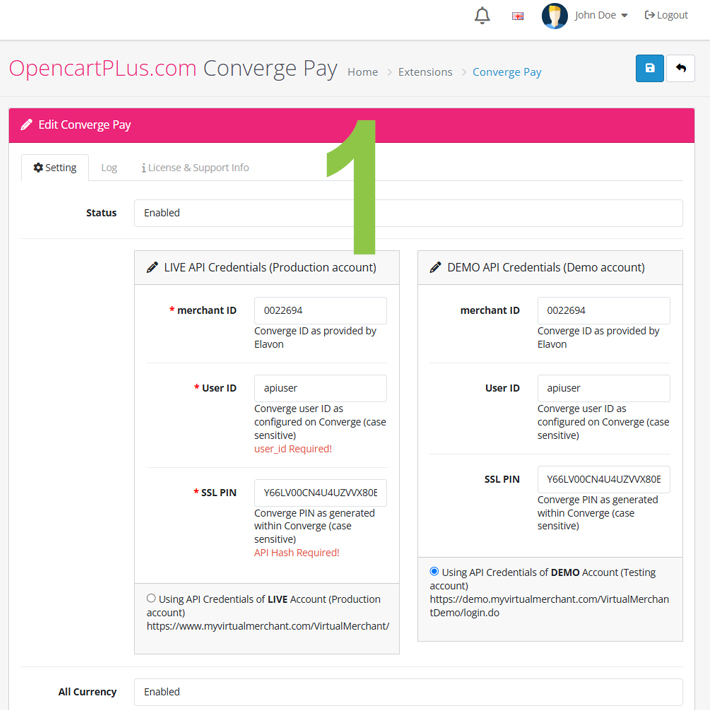
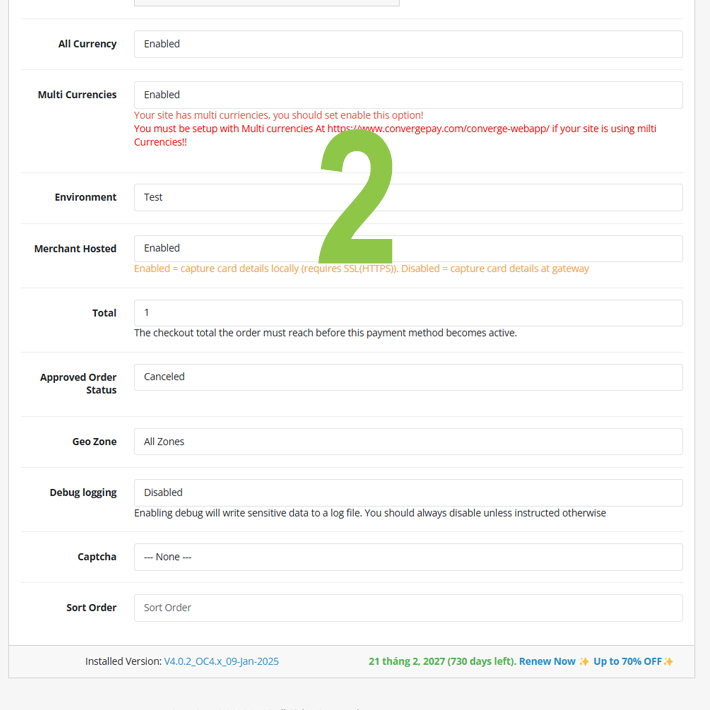
Overview ?
The ConvergePay Payment Gateway is a powerful payment extension designed for OpenCart websites. Seamlessly integrating with your store, it offers a secure and versatile payment solution. Learn more at ConvergePay! ?
Powered by Converge (Elavon), also known as Virtual Merchant, this gateway adds to your already wide range of payment options. Say goodbye to lost sales due to limited payment methods! ?
5. Clear Cache & Use
Clear the cache to make sure your changes take effect on the front end.
- Go to Admin Panel → Dashboard → Developer Settings, then click the button to clear old cached data.
 Image 5.1: Refresh developer settings
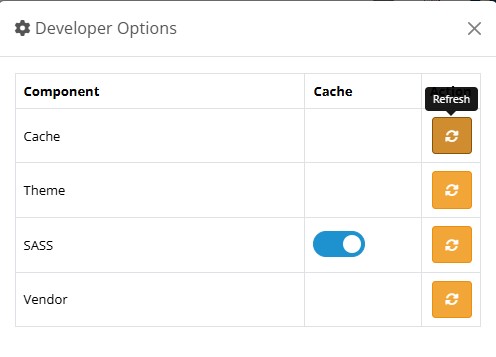 Image 5.2: Refresh developer options
 - Check Extensions → Modifications → Clear → Refresh to ensure that OCMOD modifications are recompiled correctly.
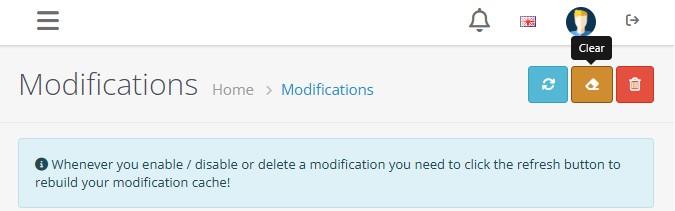 Image 5.3: Refresh modifications clear
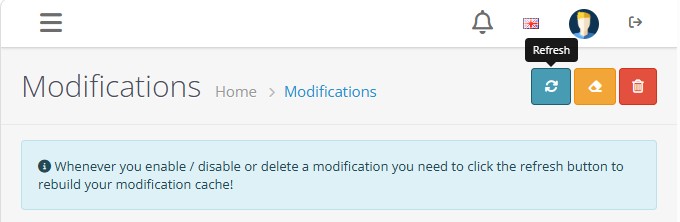 Image 5.4: Refresh modifications
 - If the extension uses VQMOD, also clear the cache in the folder
vqmod/vqcache/located in your OpenCart root. Inside thevqcachefolder, you will see multiple files named likevq2-xxxx.php. Delete all these files (do not delete the folder itself).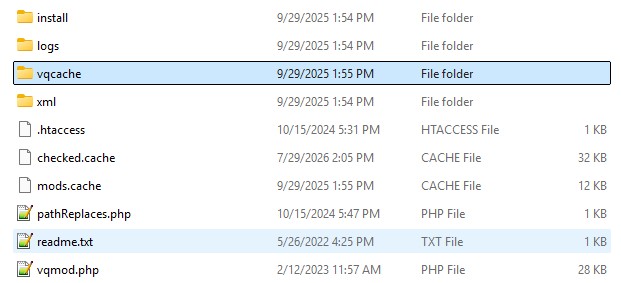 Image 5.5: Clear the cache in the vqmod/vqcache/ directory
6. Final Step & Enjoy new extension
The last step to confirm the extension is working correctly.
Go to Extensions → Extensions → Choose the extension type → Modules → OpencartPLus.com Virtual Merchant Pro → Edit and adjust any final settings if needed.
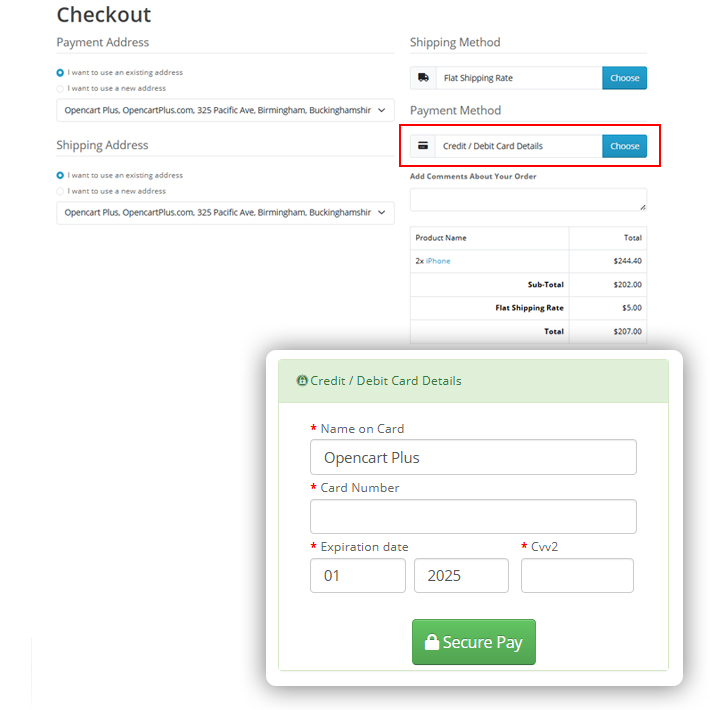
Visit all checkout forms on the online store interface to verify that the module is displayed and functions correctly in practice.
✔ Fully AJAX-Powered Checkout: Process credit and debit cards without page reloads.
7. Common Troubleshooting
Extension doesn't appear after Install
Recheck the cache (Step 5) and make sure the module is set to Edit → Status: Enabled. For OCMOD, also check Extensions → Modifications → Refresh.
VQMOD error: "File could not be found"
Usually caused by an incorrect path in the VQMOD XML file, or the vqmod/vqcache folder not being writable. Check the log at vqmod/logs/vqmod.log.
White screen after installing OCMOD
Go to Extensions → Modifications, click Clear then Refresh to remove the faulty modification cache, then try again. If the error persists, manually remove the extension's file from system/storage/modification.
Layout breaks after installing
The most common cause is the extension containing CSS/JS written for the wrong Bootstrap version. Cross-check the classes it uses against the Bootstrap version your OpenCart is running (OC 3.x uses Bootstrap 4, OC 4.x uses Bootstrap 5).