 |
Installation document for Auto WebP Converting |
Requirements
vQMOD How to Install vQmod for OpenCart 4.x
Admin Access: You need admin access to the Admin Panel to install the module.
Module Package: The module must be compatible with OpenCart4.x and in the correct format (usually .ocmod.zip or .zip).
1. Upload
Step 1: Download the Module
- Find the Module: Download the module from trusted sources like
Opencartplus.comor theOpenCart Extension Store. Make sure the module is compatible withOpenCart 4.x. - Prepare the File: The module package is usually a
.zipfile (e.g.,module-name_V*.*_OC*.*.ocmod.zipormodule-name_V*.*_OC*.*.zip). If the module is provided as a.ocmod.zipfile, it’s anOCModextension (the most common installation method forOpenCart 4.xmodules).
Step 2: Upload the Module via Extensions Installer
- Login to OpenCart Admin: Access the admin panel of your store. Example:
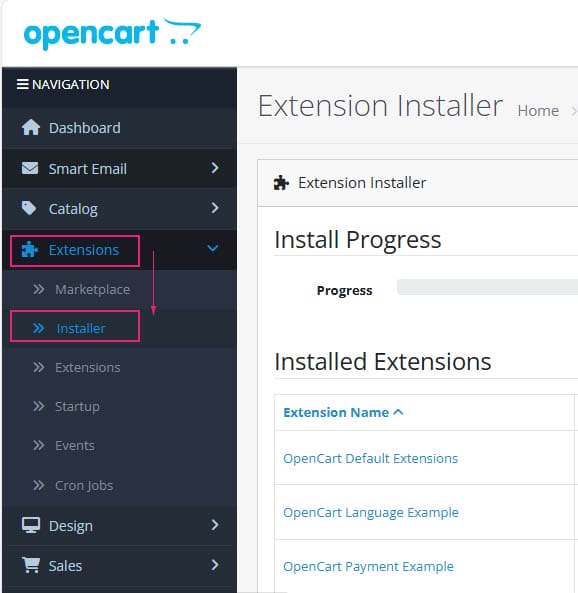
http://yourdomain.com/admin. - Go to Extensions: From the main menu, select
Extensions. Then chooseExtensions → Installerfrom the dropdown menu.
- Upload the Module: Click the button. Select the
.zipfile of the module you downloaded earlier. Once selected, click to start the upload process.
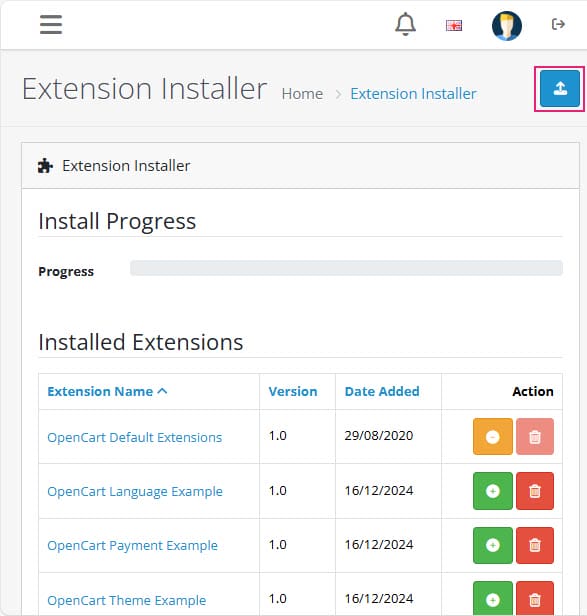
- Confirm Installation: After the
upload,OpenCartwill automatically validate the module. If successful, a confirmation message will appear. Some modules may require additional configuration after installation.
2. Installation
Step 3: Activate the Module
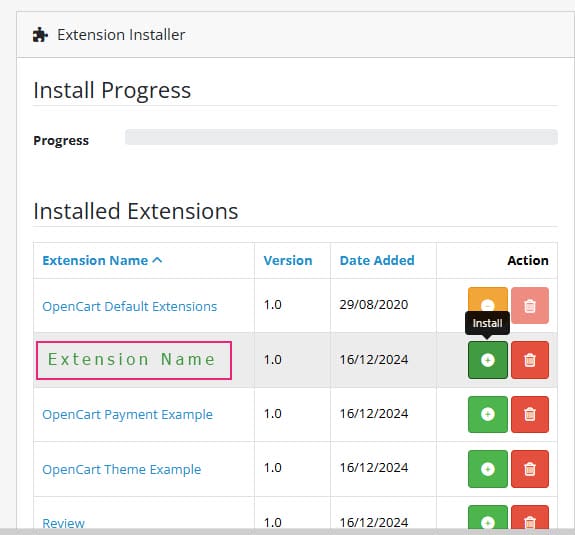
- Go to
Extensions → Installer: Access the Installed Extensions list from the side menu and select theExtension Name → click Installto activate the module.
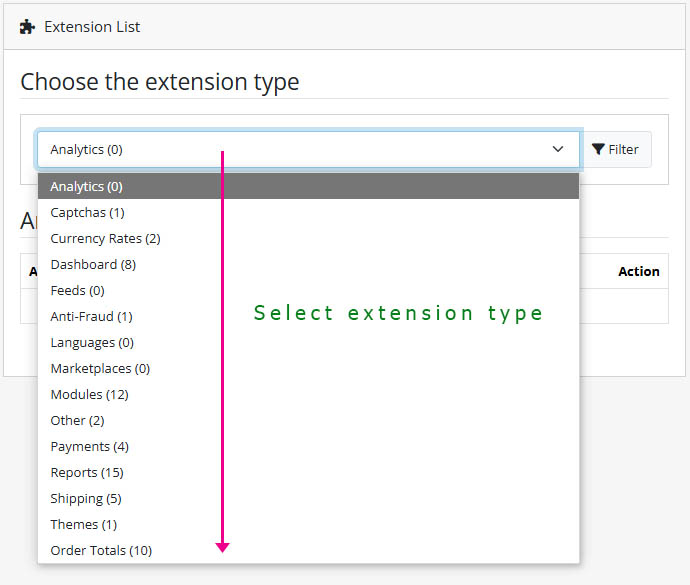
- Go to
Extensions → Extensions: From the side menu, choose the appropriateExtension Type(e.g., Modules, Payment, Shipping, Reports…).
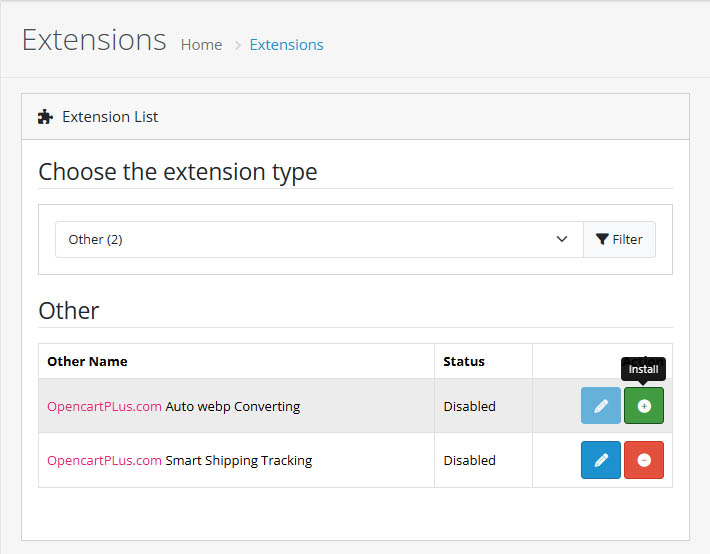
- Find the Module Name: Find the newly installed module in the list. Click next to it. Then click to
enableandconfigureit.
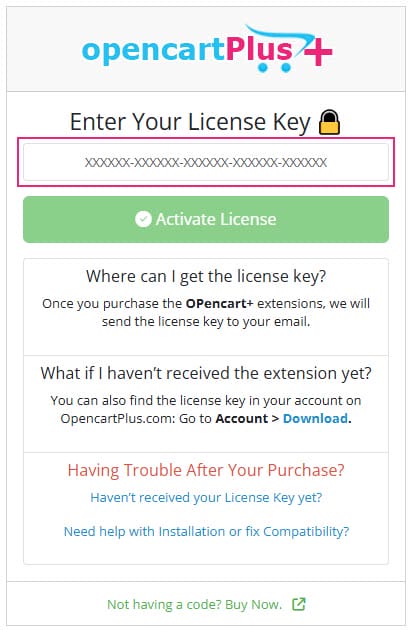
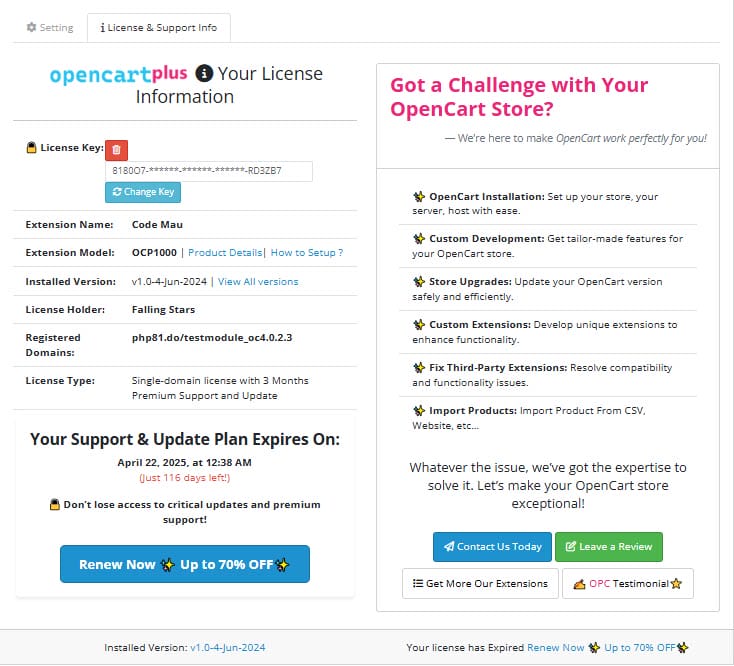
- Active Key: To use the module, you need to
activatethekey. YourLicense Keycan be found on theDownload PageofOpencartplus.comif you have a user account and purchased the module there. If you purchased it from theOpenCart Extension Store, check theemailassociated with yourOpenCart.comaccount, as we will send anemailto that address from our registered email:[email protected].
3. Configuration
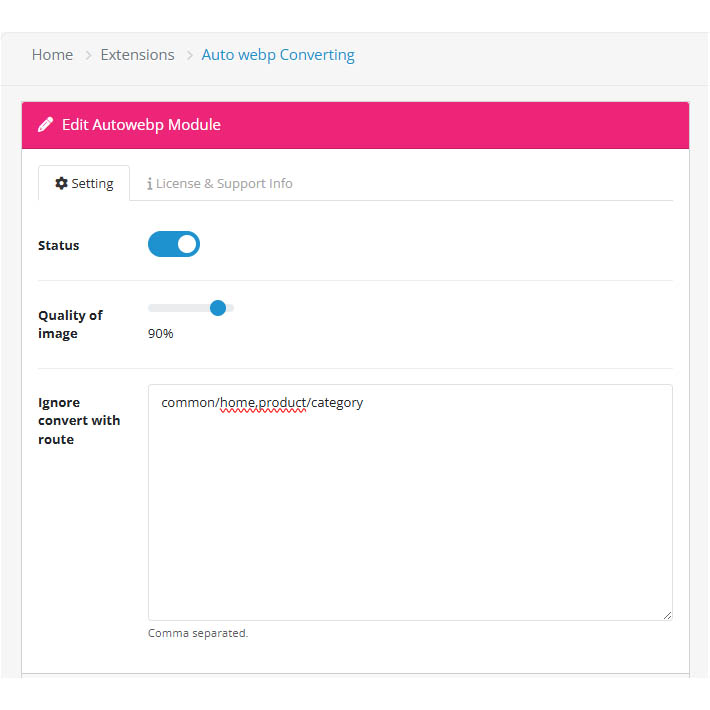
Step 4: Configure the Module
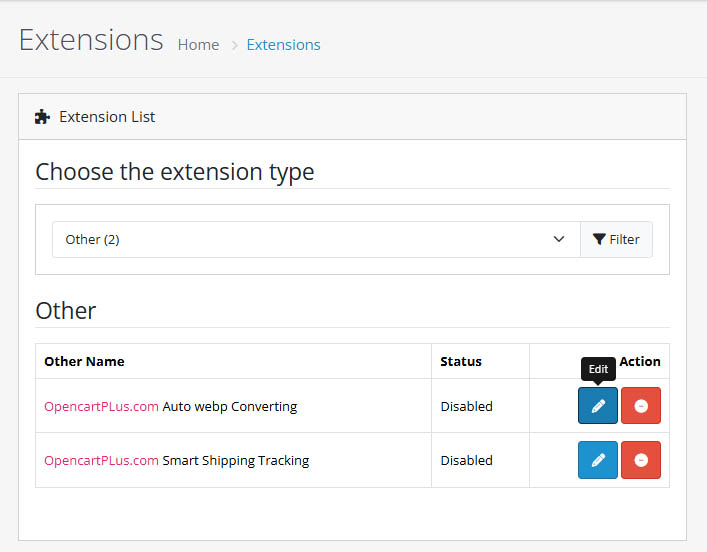
- Go to
Extensions → Other → Extensions Name: Click next to the module name to configure it.
- Follow the module’s configuration instructions: For example, setting up an API key, adjusting settings, and configuring display options.
4. Clear Cache & Use
Step 5: Clear Cache
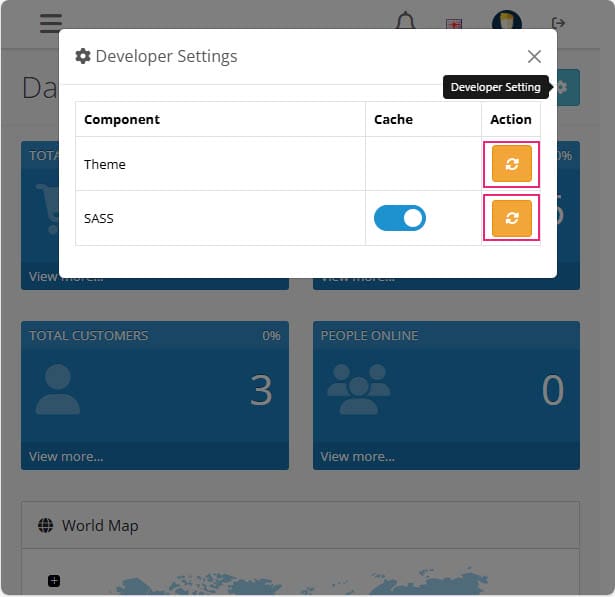
- Go to Developer Settings: In the
Admin Panel, go toSettings. Click the tab. Clear Cache: Under Settings, click to delete any old cached data and ensure the module works correctly.
5. Configurelation & Enjoy new extension
Step 6: Configure as you like and use modules
- Go to
Extensions ➔ Other ➔ Click on: Auto webp Converting Integration as shown in the image below.